Nomad Battery Cable


This ultra tough cable by Nomad has a built-in 2,350 mAh battery, which is sufficient
enough to fully charge an iPhone 7, or to deliver an extra day of usage from an iPhone 7 Plus. Nomad has designed the 5-foot-long cable to charge the iPhone first, and then top up its battery. 
                                                                                                                               buy it
Root Android 6.0 marshmallow

Root Android 6.0 marshmallow

Android "Marshmallow" is the 6th major version of the Android operating system. First unveiled in May 2015 at Google I/O, it was officially released in October 2015.
Google has posted the Android 6.0 marshmallow distribution numbers, Google calculates that 15.2%(with less than 0.1% distribution are not shown) of active Android devices were running Marshmallow during a 7-day period ending on August 2 2016.
Android 6.0 Marshmallow exists on a multitude of devices, with more carriers & devices have already received the update. More and more devices are carrying Android 6.0 marshmallow when they out of the factory nowadays. So there are more and more marshmallow users want to root their devices. Today KingoRoot will instruct you how to root Android 6.0 marshmallow devices.

Ways to Get Root Access

If you would like to get root access, there are mainly two ways, either by exploit or by third party recovery. Most of the time is using third party recovery to get the root access. Because the exploit is hard to find, and also not every device is able to get root access via exploit. The most important thing for the exploit is the successful is not very high.  However, flashing the third party recovery has a much higher successful rate than the exploit, and most the device may get rooted by flashing third party recovery.
Before you start to root your device, there are some preparation work you should do first. 
 Unlock your bootloader.
Backup your important data.

TWRP

Flash TWRP

Flash a third party recovery is an imporant thing  before the rooting start.
Go into Settings -> About and find the Build Number and tap on it 7 times to enable developer settings.
Press back and go into Developer Options and enable USB debugging.
Back to  Settings > Security > Unknown Sources enable it.

Download the TWRP.img and Kingoroot tools

Open the Kingo ROOT\tools folder. In the tools folder, type CMD at the address bar and press enter. Type the following command:
adb reboot bootloader
fastboot flash recovery (pull the twrp.img into cmd)
E.g.
fastboot flash recovery D:\Kingo ROOT\tools\twrp-3.0.2-0-flounder.img
fastboot reboot

SuperSU

Temporarily Booting TWRP

Download SuperSU-v2.46 to your device.
Boot into TWRP temporarily, if you have flashed the TWRP skip this step. Restart and then boot into TWRP
adb reboot bootloader
fastboot boot (pull the twrp.img into cmd)
Eg.
fastboot boot D:\Kingo ROOT\tools\twrp-3.0.2-0-flounder.img
fastboot reboot
Tap on “Install” and select the SuperSU zip file that you downloaded to your device. “Swipe to Confirm Flash” at the bottom of screen to begin the flash. This will install SuperSU and allow root access automatically.
Reboot device.
If you want to verify root access, download and install Root Checker.apk from the Play Store.

Nexus Root Toolkit

If you are using nexus devices, the Nexus Root Toolkit will be your best choice. This is a very user friendly and easy to use root tool.
This program will automatically bring together all the files you need to unlock and root your device in a few clicks, or flash it back to stock and re-lock it. You can also use this program to backup/restore all your important data, flash zips, set file permissions, push and pull files, install apps, generate logcats/bugreports, and much more!
The program intelligently and selectively downloads the files it needs for your device and makes sure you are using the latest files available. The program can even auto-detect your device and build.
WugFresh expressed on the official website of Nexus Root Toolkit.
Download the Nexus Root Toolkit developed by WugFresh.
If you need an "a  simple and detail guide" on how to root a Nexus by Nexus Root Toolkit. You probably shouldn't root a Nexus. Or just be patient wait for our tutorial coming soon.

CF-Auto-Root

CF-Auto-Root is written by chainfire the same one who write the SuperSU. If you are using SAMSUNG devices, congratulations most of SAMSUNG devices may get root access by CF-Auto-Root.
Download CF-Auto-Root and ODIN first.
CF-Auto-Root is a very useful root tool for SAMSUNG devices. ODIN is the ROM Flashing tool for SAMSUNG devices.
UNLOCK BOOTLOADERS
If you have locked bootloaders, flashing one of these will probably brick your device!
So before you start unlock your bootloader first.
Using CF-Auto-Root will definitely:
  • Trigger your flash counter.
  • Trip your KNOX.
  • Void your warranty.
Using CF-Auto-Root will possibly:
  • Wipe your data (if your device storage is encrypted).
  • Brick your device (if your device is incompatible).
Rooting involved risks. Proceed with caution. Root at your own risk.
No one is responsible for bricking your device.
How to root Android 5.0/5.1 (Lollipop) with KingoRoot APK

How to root Android 5.0/5.1 (Lollipop) with KingoRoot APK

Many Android users now wonder how to root Android 5.0/5.1 (lollipop) since it has been released for quite some time. "Is there any safe and easy way to root it?", someone might ask. Kingo offers every user of Android 5.0/5.1 a truly one-click rooting experience with both KingoRoot Android(PC Version) and KingoRoot (APK Version).
It is suggested that you try KingoRoot (apk version) first in that it has integrated several universal and powerful exploits and it is fairly convenient. It can save you the trouble of connecting to a computer via USB cable. But if KingoRoot apk failed to root your device, it is highly recommended that you try again with KingoRoot Android (PC Version), which intergrates more rooting scipts and has a much higher success rate.

Root Android 5.0/5.1 (lollipop) via KingoRoot.apk Step by Step

  • Step 1: Free download KingoRoot.apk    
  • You will download it directly to your Android. You can find it in "Download" on your phone.
    Root Android 5.0/5.1 lollipop device with KingoRoot apk, without connecting to PC   
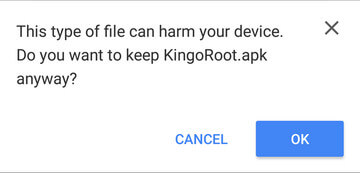
    The download will be automatically started. If Chrome has warned you about KingoRoot.apk, click "OK" to proceed.
    KingoRoot Apk Download, the best one-click root apk for free   
  • Step 2: Install the apk file of KingoRoot.
  • When installing the apk file, you may encounter some issues. Whatever it might be, follow the system instructions.
    Root any Android 5.0/5.1 lollipop device with KingoRoot, the best one-click Android apk root tool.   
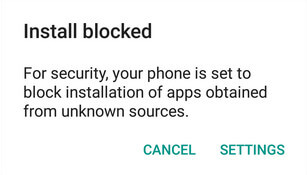
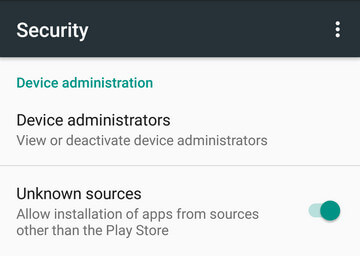
    • Install Blocked: Settings > Security > Unknown sources > Check the box and allow.
    • You device may only accept app installation coming from its native app store, like Google Play or Samsung Apps. The apk file of KingoRoot is directly downloaded from the server of Kingo and will not be able to install on your device unless you allow installing from "Unknow source".
    •        
    • Root any Android 5.0/5.1 lollipop device with KingoRoot, the best one-click Android apk root tool.       
    • Harmful App: Settings > Security > Verify apps > Uncheck it.
    • KingoRoot is an exploit-based root tool. If you have no knowledge of "Android Rooting", well, you should. Kingo exploits system vulnerabilities in order that your device can be rooted, which will be considered by Google or Manufacturers as a malicious act. But it is your choice to choose, to root or not to root. On kingo's behalf, the only thing we can do is that to make sure of our integrity and leave the choice to you.
    •    
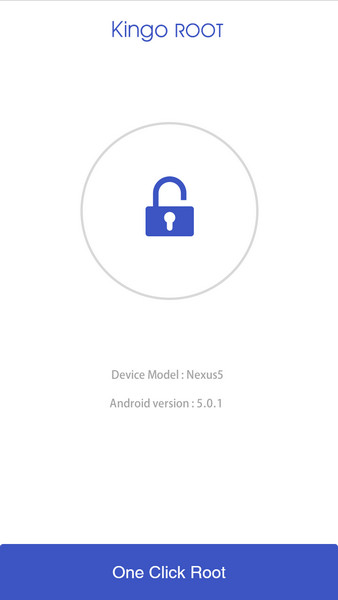
  • Step 3: Tap the icon of KingoRoot and press "One Click Root" to begin.
  • Kingo Root Apk Main Interface   
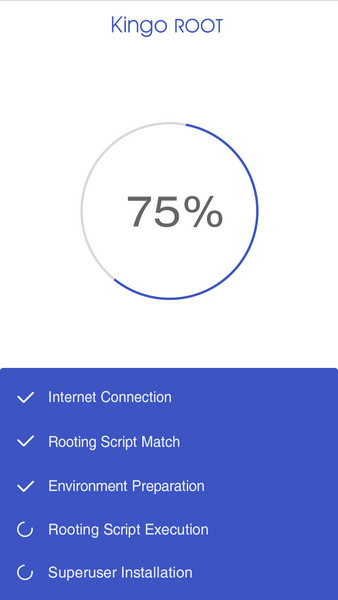
    Make sure that you have stable Internet connection when rooting with KingoRoot. It is required because the rooting scipts used are stored in Kingo's server. Without it, Kingo will fail to root your device.
    Kingo Root Apk Rooting   
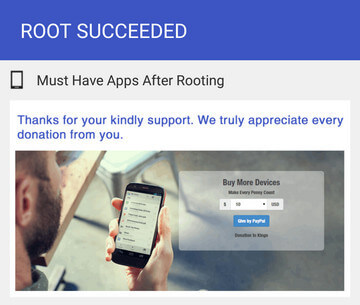
  • Step 4: Get the result: succeeded or failed.
  • Kingo Root Apk Root Succeed   
You may want to try it a couple of times because KingoRoot.apk will only download one script at a time. Running different scripts may deliver different results.

iOS 9.1 Jailbreak

iOS 9.1 Jailbreak

OS 9.1 jailbreak has been released by Pangu team on 11th March 2016 . We tried it on our device running iOS 9.1 and it detected and enabled Pangu 9 jailbreak on it . Follow the tutorial below for iOS 9.1 jailbreak using Pangu 9 Jailbreak tool. Step by step video tutorial also included.
Image : Pangu iOS 9.1 Jailbreak Update
pangu 9.1 jailbreak

How to Jailbreak iOS 9.1 :

Method 1 : Using Pangu 9.1 Jailbreak Tool [version 1.3.0]
Method 2 : Using Safari method to download Pangu 9 app icon on your iPhone homescreen Without a PC

Method 1 : Pangu 9 Jailbreak iOS 9.1

pangu 9.1 jailbreak v1.1.0 dlp
Pangu team released their much awaited iOS 9 jailbreak tool, the Pangu 9 for iPhone users. Officially it supported iOS 9 upto iOS 9.1 . We tried and tested it on iOS 9.1 [see image above] and it ran successfully. If you would like to follow the jailbreak process , here is a complete step by step guide with video instructions to use Pangu 9 jailbreak . Please note that at the time of writing this article , the tool is 100% perfect on iOS 9.1 and may throws occasional errors but will eventually jailbreak your device. Before trying out this tool , you must prepare your device for Pangu 9.1 jailbreaking .
Method 2 : Download Pangu iOS 9.1 Jailbreak App icon
This tutorial will come in handy for those users who are waiting for the official [stable release] Pangu iOS 9.1 jailbreak installer to be released. Follow the steps below with video instructions included .
  1. Launch Safari app on your device . Make sure you are connected to the internet .safari_ios_9
  2. Search this text ios 9.1 jailbreak which brings up a results page . On the page select the site with the url downloadpangu.org [as shown below]. pangu ios 9.1 jailbreak search
  3. This page is specifically designed for Pangu 9.1 app icon download on your iOS device. [ users who cannot find the result on search page can directly open this page downloadpangu.org on their safari browser]
  4. Verify that the url you have opened says dowloadpangu.org as shown in the image below download_pangu_ios_91 copy
  5. Now scroll to the bottom of the screen and tap on the Up arrow as shown here download_pangu_ios_91
  6. This will bring up a screen to “Add to HomeScreen” . Tap on this to proceed . download_pangu_ios_92
  7. Now name the app as Pangu if its not already that and tap on Add . pangu_9_app_icon0
  8. You got Pangu 9.1 app icon on your homescreen . Now tap to launch the app icon to get latest iOS 9.1 jailbreak updates on your device right away . pangu_9_app_icon1
Video : Full Tutorial of above steps
Update : iOS 9.1 signing has been stopped by Apple. This means users on iOS 9.2 or later cannot revert back to older iOS 9.1 . On the other side , iOS 9.2 jailbreak development gains momentum after leaks from 3K Assistant [ext link] where were linked to Taig Jailbreak team in the past.

Pangu Released iOS 9 Jailbreak :

Pangu Team has already released the iOS 9.1 jailbreak for supported iOS 9.1 devices. The Keen team had announced that they were working on the iOS 9.1 jailbreak and would be releasing it just after Apple releases iOS 9.1. However, given the fact that Apple will be releasing iOS 9.2 soon, it is quite possible that we might get an iOS 9.2 beta jailbreak aswell .pangu 9 - keep the device connected screen
When will Pangu Release Official iOS 9.1 Jailbreak ?
As said earlier, Apple was working on iOS 9.1 and has already released the firmware [ iOS 9.1 download ]. According to initial reports , it is known that iOS 9.1 patches earlier versions of Pangu 9 jailbreak exploits and it will not work if you try to jailbreak on iOS 9.2 and later. So we think it would be safe to guess that an Official iOS 9.1 jailbreak from Team Pangu is the way to go. Users must note that iOS 9.2 jailbreak is also in the way , and they might considering waiting for the next iOS release before releasing a jailbreak and wasting an exploit .
Subscribe to get these news updates via Email .
Apple iPhone 5 hard reset

Apple iPhone 5 hard reset

Reset iPhone 5

Reset iPhone 5: Press and hold the On/Off Sleep/Wake button and the Home button at the same time for at least ten seconds, until the Apple logo appears.

Erase your device with recovery mode

If you've never synced with iTunes or set up Find My iPhone in iCloud, you'll need to use recovery mode to restore your device. This will erase the device and its passcode.

   
 Connect your iOS device to your computer and open iTunes. 
    While your device is connected, force restart it: Press and hold the Sleep/Wake and Home buttons at the same time. Don't let go when you see the Apple logo — keep holding until you see the recovery mode screen.
When you see the option to Restore or Update, choose Restore. 
iTunes will download software for your device. If it takes more than 15 minutes, your device will exit recovery mode and you'll need to repeat steps 2 and 3. Wait for the process to finish.

Restarting and Resetting iPhone 5


If something isn't working right, try restarting iPhone, force quitting an application, or resetting iPhone.
iPhone 5 ios6
Restart iPhone 5: Press and hold the On/Off Sleep/Wake button until the red slider appears. Slide your finger across the slider to turn off iPhone. To turn iPhone back on, press and hold the On/Off Sleep/Wake button until the Apple logo appears.
If you can't turn off iPhone or if the problem continues, you may need to reset iPhone. A reset should be done only if turning iPhone5 off and on doesn't resolve the problem.
Apple iPhone5 hard reset

Force quit an application: Press and hold the On/Off Sleep/Wake button on top of iPhone for a few seconds until a red slider appears, then press and hold the Home button until the application quits. On iPhone 3GS or later, you can also remove an
application from the recents list to force it to quit.

Hard Reset APPLE iPhone 6 Plus

  1. First you should to go to Home screen.
    HardReset APPLE iPhone 6 Plus
  2. Next scroll to Settings.
    Factory Reset APPLE iPhone 6 Plus
  3. Tap General.
    Master Reset APPLE iPhone 6 Plus
  4. Select Reset, and select option "Erase All Content and Settings".
    Wipe data APPLE iPhone 6 Plus
  5. Then you will see information to confirm.
    Format APPLE iPhone 6 Plus
  6. If promted, then enter your passcode.
  7. Confirm your choice and wait to finish operation.
  8. Good job!
  9. Second method:

    1. Connect your iPhone to the computer and open iTunes.
      Remove Screen Lock APPLE iPhone 6 Plus
    2. Now choose your iPhone from the left menu in iTunes.
    3. Then click the Restore button in iTunes.
      * You can now do back up your files, just if you want.
    4. After that please confirm information about this procedure -> click Restore.
      Hard Reset APPLE iPhone 6 Plus
    5. Next you will see, that iTunes will download, prepare and restore the software on your iPhone.
    6. In the end choose "Set up as a new iPhone".
    7. Enter a name for your phone.
    8. Well done!

    Third method:

    1. You should to Plug your iPhone into your PC, or laptop.
      Remove Screen Lock APPLE iPhone 6 Plus
    2. Power off your device.
    3. Then hold the Power button for about 3 seconds.
      Permanently delete data from APPLE iPhone 6 Plus
    4. Now press and hold Home button with Power button for about 10 seconds.
    5. After that release only Power button.
      Permanently delete data from APPLE iPhone 6 Plus
    6. Release Home button, when you are alerted by iTunes saying that it has detected a device in Recovery Mode.
      Remove screen password APPLE iPhone 6 Plus
    7. Confirm this, and wait until iTunes will restore your handset.
      Restore APPLE iPhone 6 Plus